1.4. Server#
1.4.1. Local Installation#
This installs the vantage6 server at a VM or your local machine. First, make sure you have met the Requirements. Then install the latest version:
pip install vantage6
This command will install the vantage6 command line interface (CLI), from which you can create new servers (see Use Server).
1.4.2. Cloud Service Provider#
To use vantage6 at a cloud service provider, you can use the Docker image we provide. Check the Deployment section for deployment examples.
Note
We recommend to provide the latest version. Should you have reasons to
deploy an older VERSION, use the image
harbor2.vantage6.ai/infrastructure/server:<VERSION>.
If you deploy an older version, it is also recommended that the nodes match that version.
1.4.3. Optional components#
There are several optional components that you can set up apart from the vantage6 server itself:
- User Interface
A web application that will allow your users to interact more easily with your vantage6 server.
- EduVPN
If you want to enable algorithm containers that are running on different nodes, to directly communicate with one another, you require a VPN server. Refer to on how to install the VPN server.
- RabbitMQ
If you have a server with a high workload whose performance you want to improve, you may want to set up a RabbitMQ service which enables horizontal scaling of the Vantage6 server.
- Docker registry
A docker registry can be used to store algorithms but it is also possible to use Docker hub for this.
User Interface#
The User Interface (UI) is a web application that will make it easier for your users to interact with the server. It allows you to manage all your resources (such as creating collaborations, editing users, or viewing tasks), except for creating new tasks. We aim to incorporate this functionality in the near future.
If you plan on creating your own server and want to use interact with it via the UI, follow the instructions on the UI Github page. We also provide a Docker image that runs the UI.
The UI is not compatible with older versions (<3.3) of vantage6.
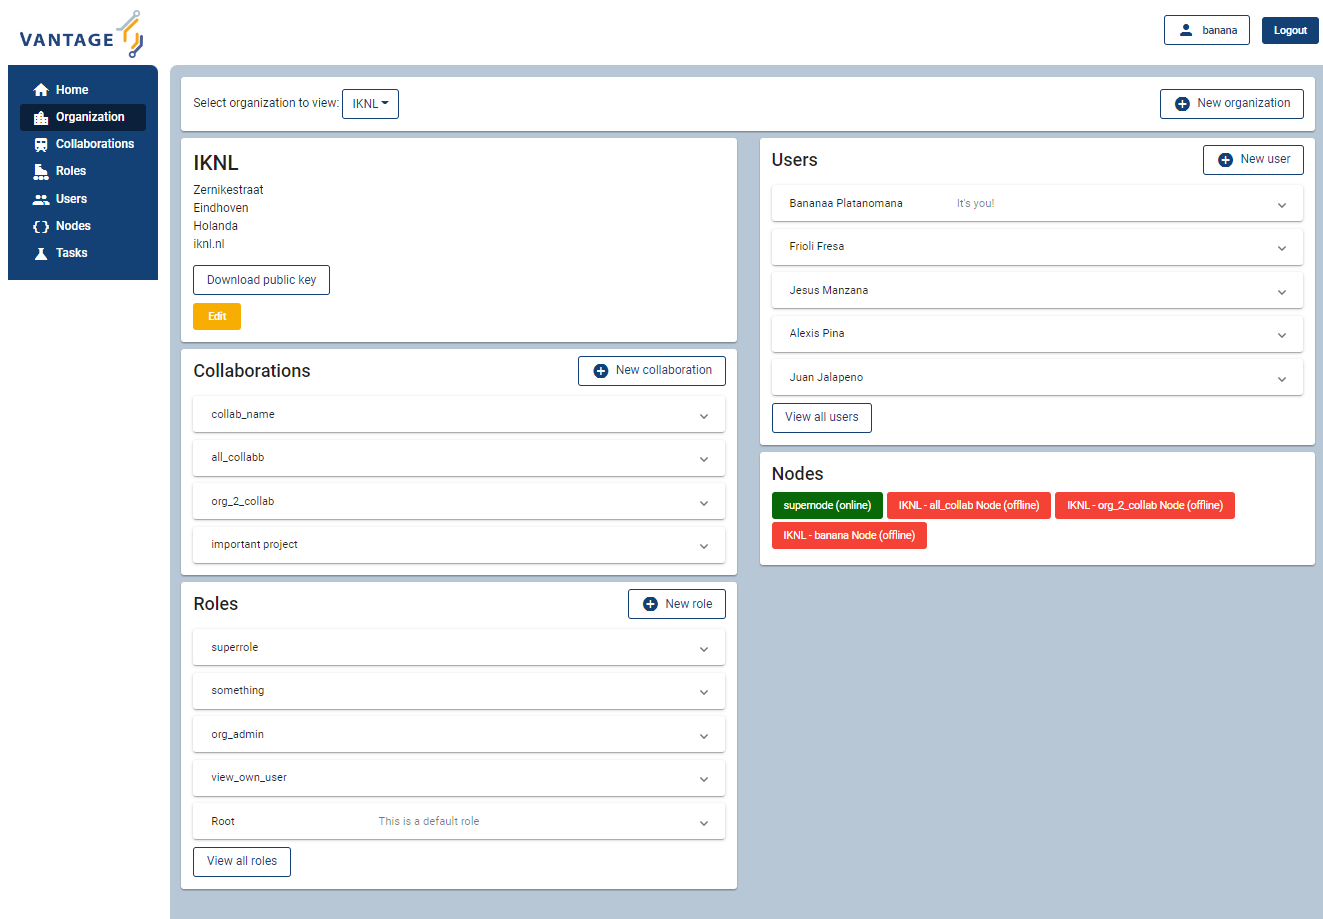
Fig. 1.1 Screenshot of the vantage6 UI#
EduVPN#
EduVPN is an optional server component that enables the use of algorithms that require node-to-node communication.
EduVPN provides an API for the OpenVPN server, which is required for automated certificate retrieval by the nodes. Like vantage6, it is an open source platform.
The following documentation shows you how to install EduVPN:
After the installation is done, you need to configure the server to:
Enable client-to-client communication. This can be achieved in the configuration file by the
clientToClientsetting (see here).Do not block LAN communication (set
blockLantofalse). This allows your docker subnetworks to continue to communicate, which is required for vantage6 to function normally.Enable port sharing (Optional). This may be useful if the nodes are behind a strict firewall. Port sharing allows nodes to connect to the VPN server only using outgoing
tcp/443. Be aware that TCP meltdown can occur when using the TCP protocol for VPN.Create an application account.
Warning
EduVPN enables listening to multiple protocols (UDP/TCP) and ports at the same time. Be aware that all nodes need to be connected using the same protocol and port in order to communicate with each other.
Example configuration
The following configuration makes a server
listens to TCP/443 only. Make sure you set clientToClient to
true and blockLan to false. The range needs to be supplied to
the node configuration files. Also note that the server configured below
uses
port-sharing.
EduVPN server configuration
// /etc/vpn-server-api/config.php
<?php

return [
    // List of VPN profiles
    'vpnProfiles' => [
        'internet' => [
            // The number of this profile, every profile per instance has a
            // unique number
            // REQUIRED
            'profileNumber' => 1,

            // The name of the profile as shown in the user and admin portals
            // REQUIRED
            'displayName' => 'vantage6 :: vpn service',

            // The IPv4 range of the network that will be assigned to clients
            // REQUIRED
            'range' => '10.76.0.0/16',

            // The IPv6 range of the network that will be assigned to clients
            // REQUIRED
            'range6' => 'fd58:63db:3245:d20d::/64',

            // The hostname the VPN client(s) will connect to
            // REQUIRED
            'hostName' => 'eduvpn.vantage6.ai',

            // The address the OpenVPN processes will listen on
            // DEFAULT = '::'
            'listen' => '::',

            // The IP address to use for connecting to OpenVPN processes
            // DEFAULT = '127.0.0.1'
            'managementIp' => '127.0.0.1',

            // Whether or not to route all traffic from the client over the VPN
            // DEFAULT = false
            'defaultGateway' => true,

            // Block access to local LAN when VPN is active
            // DEFAULT = false
            'blockLan' => false,

            // IPv4 and IPv6 routes to push to the client, only used when
            // defaultGateway is false
            // DEFAULT = []
            'routes' => [],

            // IPv4 and IPv6 address of DNS server(s) to push to the client
            // DEFAULT  = []
            // Quad9 (https://www.quad9.net)
            'dns' => ['9.9.9.9', '2620:fe::fe'],

            // Whether or not to allow client-to-client traffic
            // DEFAULT = false
            'clientToClient' => true,

            // Whether or not to enable OpenVPN logging
            // DEFAULT = false
            'enableLog' => false,

            // Whether or not to enable ACLs for controlling who can connect
            // DEFAULT = false
            'enableAcl' => false,

            // The list of permissions to allow access, requires enableAcl to
            // be true
            // DEFAULT  = []
            'aclPermissionList' => [],

            // The protocols and ports the OpenVPN processes should use, MUST
            // be either 1, 2, 4, 8 or 16 proto/port combinations
            // DEFAULT = ['udp/1194', 'tcp/1194']
            'vpnProtoPorts' => [
                'tcp/1195',
            ],

            // List the protocols and ports exposed to the VPN clients. Useful
            // for OpenVPN port sharing. When empty (or missing), uses list
            // from vpnProtoPorts
            // DEFAULT = []
            'exposedVpnProtoPorts' => [
                'tcp/443',
            ],

            // Hide the profile from the user portal, i.e. do not allow the
            // user to choose it
            // DEFAULT = false
            'hideProfile' => false,

            // Protect to TLS control channel with PSK
            // DEFAULT = tls-crypt
            'tlsProtection' => 'tls-crypt',
            //'tlsProtection' => false,
        ],
    ],

    // API consumers & credentials
    'apiConsumers' => [
        'vpn-user-portal' => '***',
        'vpn-server-node' => '***',
    ],
];
The following configuration snippet can be used to add an API
user. The username and the client_secret have to be added to the
vantage6-server configuration file.
Add a VPN server user account
...
'Api' => [
  'consumerList' => [
    'vantage6-user' => [
      'redirect_uri_list' => [
        'http://localhost',
      ],
      'display_name' => 'vantage6',
      'require_approval' => false,
      'client_secret' => '***'
    ]
  ]
...
RabbitMQ#
RabbitMQ is an optional component that enables the server to handle more requests at the same time. This is important if a server has a high workload.
There are several options to host your own RabbitMQ server. You can run RabbitMQ in Docker or host RabbitMQ on Azure. When you have set up your RabbitMQ service, you can connect the server to it by adding the following to the server configuration:
rabbitmq_uri: amqp://<username>:<password@<hostname>:5672/<vhost>
Be sure to create the user and vhost that you specify exist! Otherwise, you can add them via the RabbitMQ management console.
Docker registry#
A Docker registry or repository provides storage and versioning for Docker images. Installing a private Docker registry is useful if you want don’t want to share your algorithms.
Docker Hub#
Docker itself provides a registry as a turn-key solution on Docker Hub. Instructions for setting it up can be found here: https://hub.docker.com/_/registry.
Harbor#
Harbor is another option for running a registry. Harbor provides access control, a user interface and automated scanning on vulnerabilities.
1.4.4. Deployment#
The vantage6 server is a Flask application, together with python-socketio for websocket support. The server runs as a standalone process (listening on its own ip address/port).
There are many deployment options. We simply provide a few examples.
Note
From version 3.2+ it is possible to horizontally scale the server (This upgrade is also made available to version 2.3.4)
Documentation on how to deploy it will be shared here soon. Reach out to us on Discord for now.
NGINX#
A basic setup is shown below. Note that SSL is not configured in this example.
server {

    # Public port
    listen 80;
    server_name _;

    # vantage6-server. In the case you use a sub-path here, make sure
    # to foward also it to the proxy_pass
    location /subpath {
        include proxy_params;

        # internal ip and port
        proxy_pass http://127.0.0.1:5000/subpath;
    }

    # Allow the websocket traffic
    location /socket.io {
        include proxy_params;
        proxy_http_version 1.1;
        proxy_buffering off;
        proxy_set_header Upgrade $http_upgrade;
        proxy_set_header Connection "Upgrade";
        proxy_pass http://127.0.0.1:5000/socket.io;
    }
}
Note
When you Configure the server, make
sure to include the /subpath that has been set in the NGINX
configuration into the api_path setting
(e.g. api_path: /subpath/api)
Azure app service#
Note
We still have to document this. Reach out to us on Discord for now.